How To Start Your Drop Shipping Business With Shopify?
If you’re seeking to start an online business, you might’ve already come across drop shipping. Basically, it is a modern model for doing online business, that requires a handful investment upfront. But the question that arises in every startup entrepreneur’s mind is, will it really work for me and how to start with drop shipping?
But before we jump into further details, it’s important to find the answer of “what is drop shipping?”
What is Drop Shipping?
Drop shipping is a type of retail fulfillment method, where a store purchases the products directly from a supplier instead of stocking the products in a warehouse, and then ships them straight to the customers. Which means, the seller doesn’t need to handle the products.
All in all, this is a hands-off experience for the seller, as he doesn’t have to store the inventory in advance and it’s actually the third-party supplier who is taking care of the products. The seller is free from all of these headaches. When a customer places an order, it is sent to the supplier and the rest is up to him, as he is the one responsible for holding the product and shipping it to the customer. You only have to pay for what you’re selling. Many entrepreneurs are adopting drop shipping model, as it is hassle free and requires less money. And you can do this all sitting in home with just a laptop and a stable internet connection.
Where to Start Drop Shipping?
By now one thing should be clear in your mind that this business model is sustainable financially and in terms of its longevity. So, the next big question is how to start with drop shipping?
All you need is a website that can host your online store, where you will list the products and get the customers on your website to sell the products. This might sound a bit difficult, but in this day and age, there are a lot of different websites that offer to host your online stores and are reliable as well. Choosing an ecommerce platform like Shopify can ease your burden a lot, as it offers more than just product functionality with its daily user traffic. If you don’t have an idea how to get it live on the board how your website will look alike, just check the following Premade Shopify Stores. We’ll guide you through to make sure you’re not only on the right track but also end up on the right platform to start you drop shipping business. Let’s dig deep in it.

Get Started with Your Shopify Store
As we have discussed above, for every drop shipping business, building your website is a must. No drop shipping business can get started without a dependable platform and Shopify provides you that platform. Being the most widely known ecommerce platform, Shopify offers a lot to its sellers. Being purely a drop shipping platform, it is user friendly and easy to use with its packed features. Adding up to its online store builder, it also allows you to handle the sales, payments and marketing.
Once you’ve decided your niche and are ready to start with Shopify, these are some of the important guidelines you would be following to make your Shopify website start reaching the customers’ screens.
1. Start with A Shopify Account
First step should always be to create an account, so go to the website of Shopify, and click on “Get Started” button. When you’re creating an account for Shopify, it’s better to have the name of your store in mind as well, as this is going to be the first thing asked while creating the account. Shopify will ask for some further information to set up your initial account.
Once you’re done with the initial phase, Shopify will take you to the rear-end of your online store. The URL assigned to you for backend access by Shopify will be in this format: YOUR-STORE-NAME.myshopify.com/admin. Shopify send an email containing your store’s admin URL, so make sure you’ve bookmarked the URL for easy access to the site. If you need any assistance in creating Shopify store, just talk to MyShopifyStores Experts.

2. Adding the Products
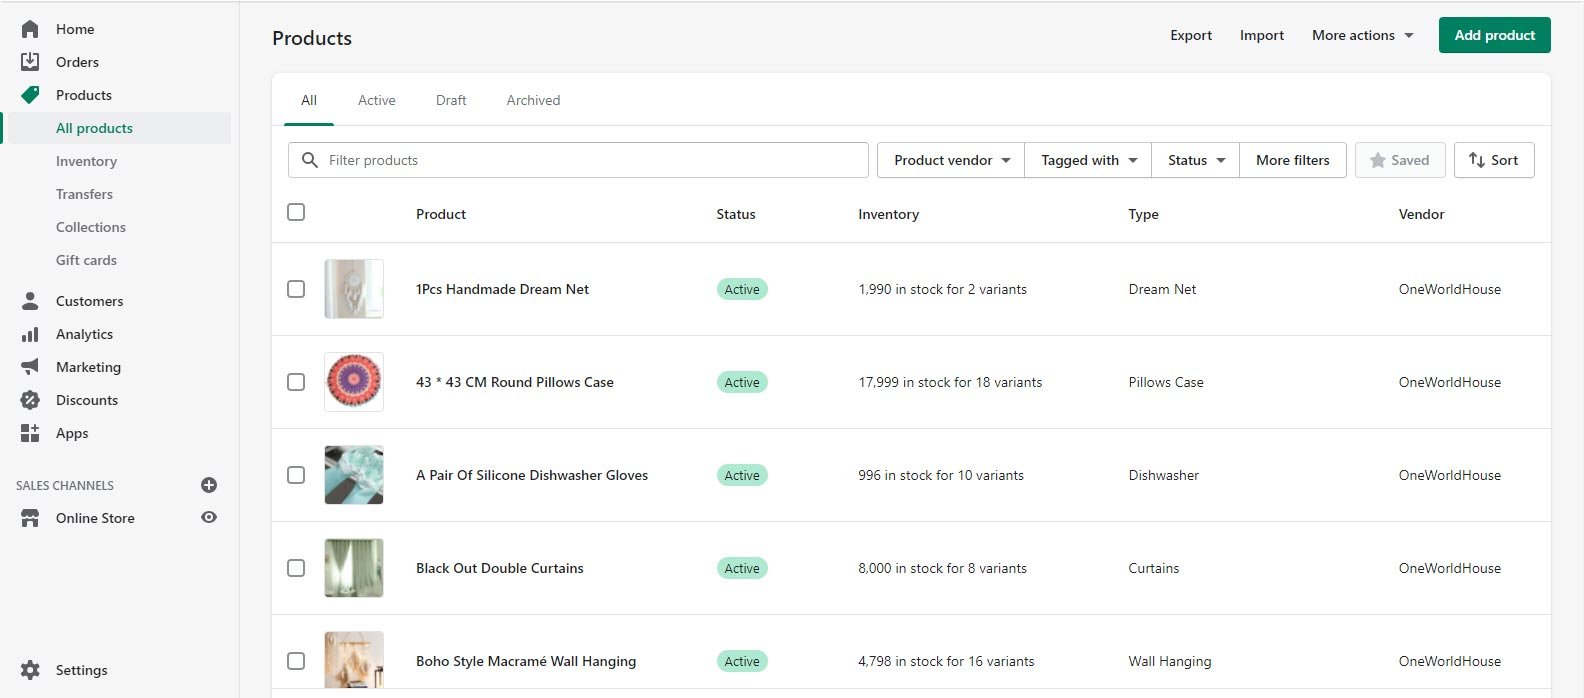
When you’re done with your Shopify account setup, the next thing on to-do list is adding the products to your store. It’ll take you to Shopify dashboard. Once you’re on the dashboard you can do various things from designing your store to setting up your domain, adding the products and many more.
But starting with adding the products must be your priority and there are a number of pros to it.
Let’s have a look at some of the steps you should follow to add the products to your Shopify store.
When you’re done with your Shopify account setup, the next thing on to-do list is adding the products to your store. It’ll take you to Shopify dashboard. Once you’re on the dashboard you can do various things from designing your store to setting up your domain, adding the products and many more.
But starting with adding the products must be your priority and there are a number of pros to it.
When you’re done with adding the products to your store, next step is to edit the details of every product. Such as, the title of product, the description and search tags to name a few.
Setting up collections is the next thing on to-do list. Dividing your products to different categories can help your customers find out the products of their liking more easily. You can set up different collections according to the product type, customer type (sexes), and sales (if any sale is going on).
3. Designing the Store
Once you’re done with adding the products, next step is to design the layout of your store as per the needs of customers. Designing your Shopify store is pretty straight forward with the built-in features of Shopify. To get going, click “Online Store” on the backend of your Shopify store. You can either go with the free Shopify themes or search their market for the paid ones, purely depending on your budget. Return to your Shopify backend and click “Customize” once you’ve chosen a theme
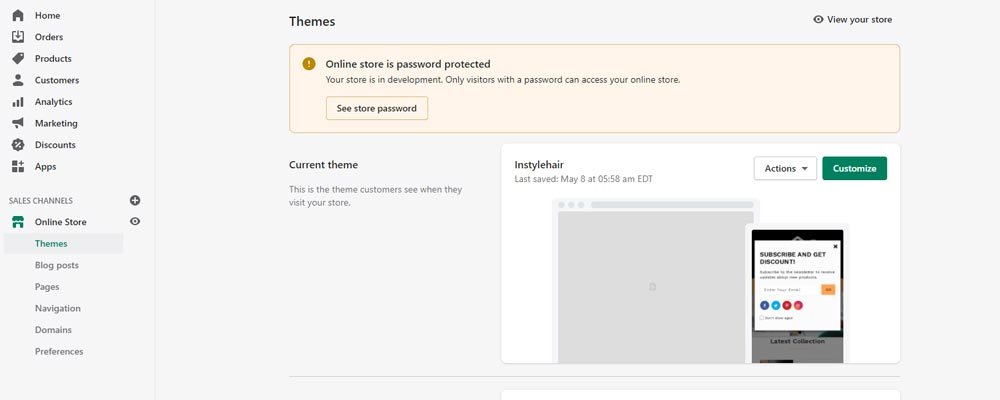
It is the next big thing to-do on your Shopify site. These pages can include the likes of “About Page, Contact Page, Shipping and Return and FAQ”. To create the page, click the “Pages” button on the left-hand menu bar of your Shopify backend, and the click on “Add Pages”. After entering the title, you can finish off by doing the SEO if you’re competent enough to deal with this and then save the changes. Repeat the same process again to create as many pages you want.
When you’re done with adding the products to your store, next step is to edit the details of every product. Such as, the title of product, the description and search tags to name a few.
Site’s navigation is the next step in designing your Shopify store’s layout. You can start setting up your site’s navigation by clicking “Navigation” on the left-hand menu of your backend page. Click “Add Menu Item” to add an item from the list of pages, collections, or products you’ve already set up.
Editing preferences of your site to finish off the designing process. In this section of your Shopify store’s backend, you can edit your site’s title and meta data descriptions. You can do this by clicking “Preferences’ button on your left-hand menu.
4. Add A Domain
Done with setting up the store? Next thing to ponder is adding a domain name. Your store’s default URL without a domain name will be https://YOUR-STORE-NAME.myshopify.com/. Not having a domain doesn’t mean your site will not run at all, but with a custom domain name your store will be more prospective to appear as a professional site.
Shopify has eased the process of adding a domain for your site’s store. Your domain name settings can be found under “Online Store” menu of your backend Shopify. On reaching the page, you’re given three options to choose from:
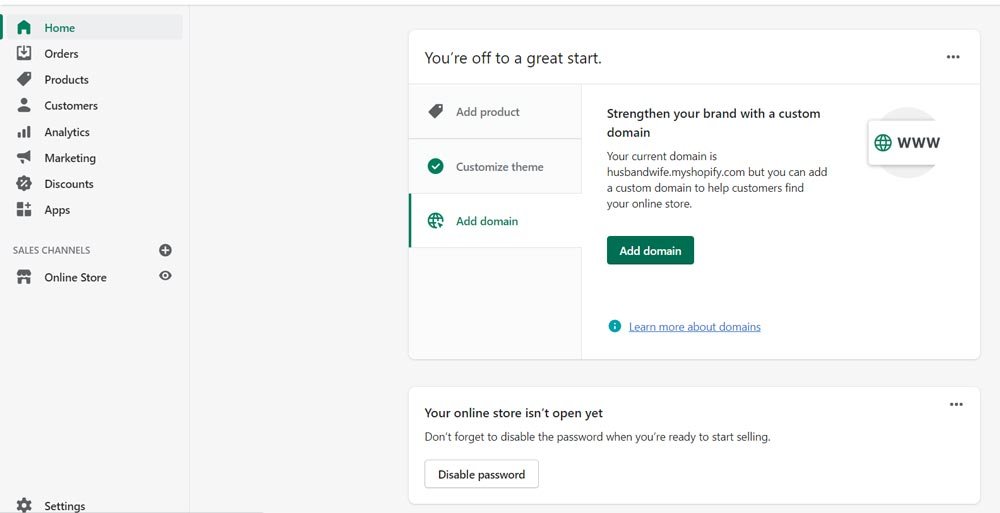
What this means is if you already have a domain (e.g. Bluehost, GoDaddy, or HostGator), you can use that domain to connect with Shopify and the system will assign that domain name to your Shopify store.
By transferring the domain to Shopify, you can manage, pay for and renew your domain right from the backend of your Shopify store. Transferring the domain can be a hard task, so make sure to follow the guidelines given by the domain provider and Shopify to successfully transfer the domain to Shopify.
You can also purchase a new domain, if you don’t have one. Shopify offers custom domain prices starting at 11 USD per year.
5. Set Up Payment
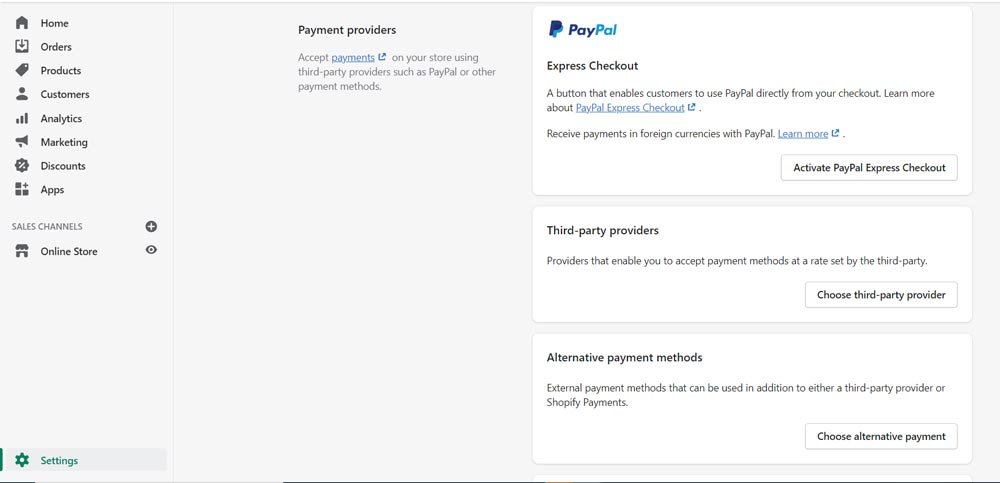
On this stage, you’ll set up the payment methods for your products. You can do so by clicking on the “Settings”, on your left-hand menu, and then clicking “Payment Providers”.
Shopify Payment and PayPal are set to default as your payment providers, but you can use other payment providers as well to facilitate your customers, be it Amazon Pay, Bitcoin, or any other service.
The thing to remember here is that Shopify can only transfer the payment to your bank account if you’ve provided all the details while setting up your account.
6. Select A Shopify Paid Plan
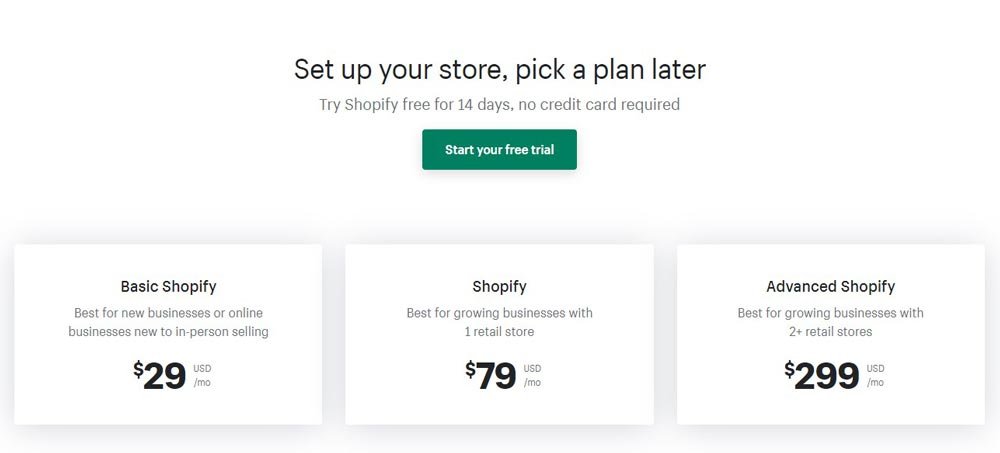
Shopify offers a 14-day free trial with which you can test out most of the features and add your products to the store as well, but you won’t be able to list your products for sale until you choose a monthly paid plan.
In order to generate some revenue, select your paid plan under the “Select a Plan” button, and list your products all around the globe. All you would be required to do is enter your credit card details and your Shopify store will be officially up and running.
So, what’s your plan? Don’t get it too tough, as neither it’s a big investment, nor a challenging thing which we are supporting you. Order your Shopify Store today with us, as low as you can only imagine.


